Well, there’s a good lesson learned here: when in doubt about a recipe, Google it. If I had done so, it would have quickly been clear to me that my version of the Cheddar-Stuffed Crusty Loaves from the back of the King Arthur bread flour package would be a little different from what the recipe originally intended. Not bad or even wrong per se, but different.
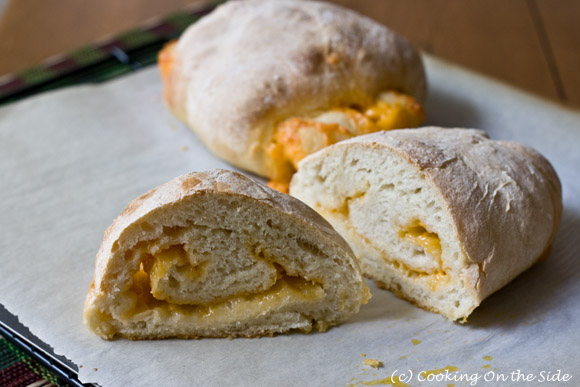
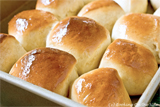
What tripped me up was the direction to position the dough, which had been rolled into a cheddar stuffed log and sliced into four sections, cut-side down. Really? So this rolled up dough was supposed to just sit there on the parchment, like a four-inch tall tree stump, and bake properly in the oven? It just didn’t look right to me. So I made the call to go ahead and position the dough on its side, with the smooth side up. Well, as you can see in the photo above there’s actually a valid reason not to do that – the dough kind of shoots out of the sides.
If I’d consulted The Google, I would have discovered that YES, in fact you are supposed to set the dough on its cut side like a little tree stump. When you do, you’re rewarded with a nice, round little loaf with a lava-like flow of extra sharp cheddar cascading down from the middle (see a photo here). Aha.
Sigh…I still was happy with how my loaves turned out, even if they were a little tweaked. They tasted great (would go great with some spicy chili) and, hey, mine came with handles! They gave me easy access to the cheesy center of the bread, which is the best part of it anyway. 🙂
Cheddar-Stuffed Crusty Loaves
From the back of the King Arthur Unbleached Bread Flour package
Yields 2 full-size or 4 smaller loaves
INGREDIENTS:
Starter:
1 1/4 cups bread flour
1 teaspoon salt
1/2 teaspoon instant yeast*
1/2 cup cool water
Dough:
All of the starter
1 to 1 1/4 cups lukewarm water
3 1/2 cups bread flour
1/2 teaspoon instant yeast*
Filling:
2 1/2 cups extra sharp cheddar cheese, grated or shredded
1 tablespoon garlic oil (optional)
DIRECTIONS:
To make the starter: Mix the 1 1/4 cups flour, salt, yeast and 1/2 cup water. The starter will be very dry; if it doesn’t come together, add a bit more water. Cover and let rest overnight at room temperature; it’ll become bubbly.
To make the dough: Combine the risen starter with the water, salt, flour and yeast. Knead – by hand, mixer or bread machine set on the dough cycle – to make a smooth dough. Place the dough in a lightly greased bowl, cover and let it rise for 1 1/2 to 2 hours, until it’s nearly doubled in bulk.
Pat and stretch the dough into a 9″ x 12″ rectangle. Spritz with water and sprinkle with the grated cheddar cheese. Starting with a long side, roll it into a log, pinching the seam to seal. Place the log, seam-side down, on a lightly floured or lightly oiled surface. Cover it and let it rise for 1 to 1 1/2 hours, until it’s puffy though not doubled in bulk. Towards the end of the rising time, preheat the oven to 425°F.
Cut the log into four crosswise slices, for mini-breads; or simply cut the dough in half, for two normal-sized loaves. Place them on one (for two loaves) or two (for four mini-loaves) lightly greased or parchment-lined baking sheets, cut side up. Spritz with warm water.
Bake for 20 minutes (for the mini-loaves), or 35 minutes (for the full-sized loaves), or until the cheese is melted and the loaves are a very deep golden brown. Remove from the oven; serve warm.
*I used Fleischmann’s Rapid Rise Yeast. Instant yeast is not the same as active dry yeast.

I’m so loving this even if they didn’t turn out exactly as planned. Bread stuffed with cheese that hopefully was turned into a sandwich (or panini) stuffed with more cheese…sigh.
Now there’s an excellent idea!
I just made this same bread recipe from the bag! I had the same confusion with the directions and mine turned out just like yours! I agree it still tasted great but the other one may be prettier. I’m glad I’m not the only one who was confused by that!
I saw your photo on tastepotting and thought….wow, that bread looks amazing.
I love things that ooze cheese!
Oh, look at all that oozy cheese! And how perfect for winter.
And yes, I swear by Googling recipes….although more often than not it throws up faceless, nameless, way-too-many-advertisements-on-the-side websites at me rather than one from a lovely food blog.
(On second thoughts, there should be a separate Google sub-site for food bloggers!)
There actually is such a Google sub-site for food bloggers: http://www.foodblogsearch.com – you’re right, this would be a great reason to use it!
These look great–sideways or not!
I’ve never made homemade bread before but couldnt resist trying these…and I’m so glad I did! They came out amazing…and so much easier than i thought they would be!!! I’m making these for a super bowl oartyt but am going to use mozzarella cheese and add some pepperoni to make pizza rolls…can’t wait to taste them!
Congrats on your first bread baking! And I love the pizza roll idea. 🙂
I am in the process of making these and got hung up on the way to place it on the pan as well. You are the first site that came up in the search engine that I looked at for answers and I’m so happy to have stumbled across your blog! Thanks for making it clear to me too how I am supposed to place these loaves on the pan.
I’m glad it was helpful! Hope your loaves turn out well. 🙂
I was confused about the positioning too. I was hoping to find an image or something by Googling. Even better! I found this blog. Now I can have the cheddar lava that was intended. Thank you.
Thanks for putting this up. My favorite bread! But I leave out the cheese. It was my go to bread for years, recipe from back of King Arthur flour sack. I lost my recipe & I couldn’t find it on King Arthur wedsite. I made it once with cheese but I prefer it without. Great crust, great texture.