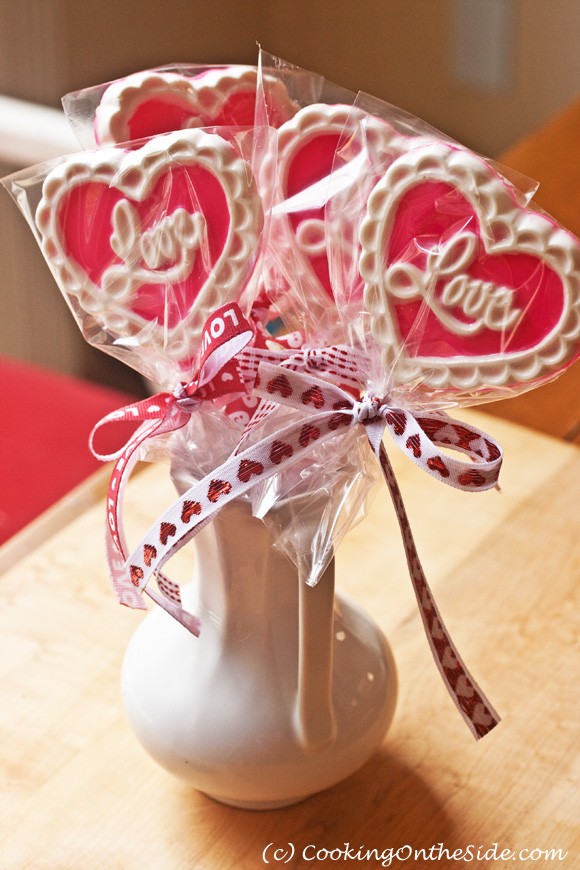
I love making treats for people — it truly makes me happy, not only to see the delight on their faces but also to let them know that they are special to me. I had the chance to take a fun chocolate class last week where I learned how to make Valentine’s Day Chocolate Lollipops among a myriad of other confections (my family is still working through the second box of goodies I got to take home!). I’m, by no means, an expert at this yet, but I’m excited to share this easy technique I learned in case you’re looking for a special treat to make for your valentines!
On a rainy Thursday evening, a group of about 15 of us from the San Diego chapter of Les Dames d’Escoffier gathered in the classroom area of Do It With Icing for a Valentine’s Day candymaking extravaganza. Owner Linda Bills showed us how to make everything from chocolate lollipops to fudge to truffles, chocolate-covered popcorn, bon bons and more. I instagrammed the photo below…this was only half of the goodies I took home that night.
To make the lollipops, it takes more of a technique than a recipe. I’ll share with you the terrific tips that Linda from Do It with Icing taught us in her class. Here’s what you’ll need:
- A candy mold (get them at a cake decorating or craft store, mine was only about $2.50)
- Coating chocolate (aka candy melts — Linda recommends the Guittard and Merckens brands, which you can find at a cake decorating store; Wilton also makes them, sold at grocery and craft stores)
- Lollipop sticks (sold at craft stores)
- Paint brush (if you’re planning to use multiple colors)
- Microwave-safe bowl
 Step 1: Melt Your Chocolate
The easiest way to melt coating chocolate is in the microwave. (NOTE: We learned how to make lollipops with coating chocolate — you can also make them with “real” chocolate, but you’ll need to temper it. That’s another class for another day. :-)) You may know coating chocolate as “candy melts” — they’re those disc-like pieces that come in a variety of colors. I melt mine in small batches, since each lollipop really doesn’t require that much chocolate (and my mold only makes 3 lollipops at a time). I pour about a cup of the coating chocolate pieces into a small microwave safe bowl and heated them for 30 seconds at 50% power. The chocolate doesn’t look melted, but I give it a stir and continue heating for 30 second at a time at 50% power, stirring between each interval, until it’s melted.
Chocolate melting no-no’s: don’t overheat it (it will return to a solid mass above 125ºF), don’t let any water get into it (it will seize up), don’t let it cool down too much (it will have whitish streaks when molded — reheat it if it cools and starts to firm up).
Step 2: Fill the Molds
The simplest way to fill the candy molds is to add spoonfuls of chocolate and then tap the mold on the table to get the air bubbles out — the chocolate will spread to all of the crevices. It’s better to err on the side of underfilling the molds so you don’t get “feet” on your chocolate design.
The design of my valentine mold lent itself to multiple colors, so I went for it. All I had to do was take a paint brush (a smaller one would have been easier, but I did my best with the one I could find) and carefully brush chocolate into the accent areas of the mold. I lifted the mold a few times to “preview” the underside to make sure the chocolate was staying within my intended areas (and cleaned it up a bit with my clean hands where it wasn’t). After that I spooned in the main color and tapped the air bubbles out.
Step 3: Add the Lollipop Sticks
Slide the lollipop sticks about halfway up the mold and turn the stick 3 complete rotations to adhere the chocolate to the stick. This is the easiest step.
Step 4: Chill
Chill the mold in the refrigerator for 10-15 minutes or the freezer for 5-7 minutes. (Actually, this is the easiest step!) You’ll know they’re set when the mold has a frosty appearance and the lollipops lift out easily. If they don’t lift out easily, let them chill for a few more minutes.
That’s it! It’s pretty easy, and they make fun homemade gifts — we’re giving them to my kids’ teachers this week. Happy Valentine’s Day!


I LOVE these!!! My kids would go NUTS! Beautiful job, as always.